
We've all been there. You've followed the recipe to the tee, preheated the oven, set the timer, and eagerly waited for the sweet scent of success to fill your kitchen. But as you open the oven door, you're met with a disaster: a burnt bottom, a sunken center, or an unappetizing texture. Fear not, my fellow bakers! In this blog, we'll tackle the most common baking problems and provide you with foolproof methods to fix them.
Let's roll up our sleeves and learn how to fix baking disasters:
Help, My Cake is as Flat as a Pancake

What Happened?
Don't panic! Salvaging a flat cake is easier than you might think, but first things first, let's try and identify what happened:
Has your baking powder/soda lost its potency because it is out of date or perhaps, not enough was added?
Did you over-mixing the cake batter? This can cause the gluten in the flour to over-develop, resulting in a dense and flat cake.
Maybe the ingredients were Incorrectly measured? Baking is a science, and even a slight deviation from the recipe can affect the outcome.
Are you using the correct-sized tin? For example, if your tin is too large for the cake mixture, it will spread out too thinly, resulting in a cake as flat as a pancake.
Was your oven at the correct temperature? Every oven is different, so baking times are only approximate. To achieve the best results, investing in an oven thermometer for an accurate measurement could really make a difference
Did you forget to pre-heat your oven or took too long to put your cake in the oven after mixing the ingredients? For the perfect rise and even texture, make sure to put your cake in the fully heated oven as soon as you combine the wet and dry ingredients. This allows the raising agent to work its magic and react with the mixture at the optimal time.
How to Fix it?
So, now that we know what may have caused the issue, let's move on to how to fix it with some creative ideas:
Make a cake sandwich - a cake sandwich is a fun and unique way to enjoy a flat cake. Simply slice the cake in half and fill it with whipped cream, fresh fruit, or ice cream!
Layer it up! - try adding some extra height to the cake with extra frosting layered with fruit and decorations.
Make a pie – a flat cake makes a great base for a perfect pie!
If all else fails, you can always turn your flat cake into cake pops, trifles, or a delicious crumbly topping for ice cream or yogurt. Check out our blog on how to transform your baking fails into delicious treats here.
Help, I have a sunken Cake
Have you ever baked a cake only to find a huge sinkhole in the middle? Let's explore some of the common issues:
What Happened?
Did you bake cake long enough? If the cake is undercooked, the structure won't be able to support the weight of the cake and it will collapse in the middle. To avoid this, make sure you follow the recipe's instructions for baking time and use a toothpick or cake tester to check if the cake is fully baked before taking it out of the oven.
Did you take a sneaky peak too many times? If you open the oven too many times, it lets out the heat and disrupts the baking process.
Did you use too much leavening agent? Adding too much baking powder or soda can cause the cake to rise too quickly and then collapse.
Is there too much air in the batter? This may seem counterintuitive, as we often associate light and fluffy cakes with lots of air bubbles. However, if you over-mix and create too much air in the batter, the cake can collapse in the middle during baking
Similarly to flat cakes, incorrect measuring, over-mixing and inaccurate oven temperatures can also be contributing factors
How to Fix It?
Treat-filled masterpieces! – Simply frost your cake as usual and use the sunken center as a bowl to hold all your favorite goodies. Think unwrapped candies like coated chocolate pieces, gummy bears, or fruit candies, or elevate it with some macarons or cookies. Alternatively, fill the dip with lemon curd, mousse, or cream and then frost the top for a deliciously indulgent dessert.
Frost and frost again! - Fill the hole with frosting, continue upwards until level, and if you feel up to it, keep it going! You can also try spiraling the frosting, as this will help camouflage the large dent.
Level it out or flip it over – if your dip is not too deep, carefully slice it off with a knife or a cake leveler, or, of course, simply turn the cake upside down for a perfectly level surface.
Ice cream cake – this would make a great base for an ice cream cake. Simply layer soft ice cream over the top and freeze.
But what if your cake is beyond repair? You can always repurpose it into a trifle, a ganache, or even add it to milkshakes for a decadent twist. Check out our blog on how to repurpose your baking fails into delicious new desserts here.
Help, My Cake is Stuck in the Pan

So, you've poured your heart and soul into baking a scrumptious cake, only to have it hold on to the pan for dear life. Fear not, there are a few tricks to help you release that cake from its metal prison. But, before we jump right in, let's make sure your cake has 100% cooled down. We don't want any accidents or cake casualties!
Freshly baked cakes straight out of the oven are still expanded from the heat and are more likely to stick, whereas cooled cakes will naturally loosen up from the pan and be easier to remove. To give it a little helping hand, we highly recommend using a cooling rack to keep the air circulating around the base of the cake, where it's most likely to stick. Top tip, once your cake has cooled down a little, you can also pop it in the fridge to speed up the cooling process.
What next?
Use a knife or spatula - Run a non-serrated knife or spatula around the edges of the cake to loosen it from the pan. Turn upside down and gently tap the bottom of the pan to release the cake. You may need to leave it inverted for another few minutes before you see results.
If your cake remains stubborn, you can try heating it or freezing it!
Heat it – take a hot, clean kitchen towel or dampen it with warm/hot water (wring out the excess water to avoid any soggy disasters!), wrap it around the cake tin, and let it work its magic. This may seem a little counterintuitive, but the warmth of the towel heats up and expands the pan, making your cake’s escape all the more effortless.
Alternatively, you could pop your cake back into a preheated oven for just a few minutes or steam it out. Simply warm up a bowl of warm water in the microwave to create steam, then place the cake inside and let it steam for a few minutes. Just don’t turn on the microwave, or you will end up with an explosion on your hands. The steam will work wonders and help your cake loosen from the pan.
Freeze it – Either place a bag of ice on top of an inverted cake for a few minutes or place the cake in one of our airtight containers, or wrap it up tight in plastic wrap and stick it in the freezer for a couple of hours until firm. Then run a knife or spatula around the edges and remove the cake without the worry of it crumbling to pieces.
How to Prevent this Catastrophe?
Grease the pan – Let's start with the basics - grease that pan. Don't be shy, fully coat the inside of the pan with grease or baking spray.
Add flour or breadcrumbs – once greased, sprinkle flour or breadcrumbs (to add a bit of texture!) on top, making sure you cover all the nooks and crannies.
Use parchment paper - If you're dealing with a pan that has a flat base and straight edges, parchment paper is a great solution. Place the pan on top of the paper and trace around the edges with a pencil. Cut the paper to size, and press it into the pan, smoothing out any pesky bubbles or wrinkles. For those who want to be extra cautious, go ahead and grease and flour the parchment paper too!
Use a springform pan – This can really simplify the removal process. Just remember to let the cake cool down first!
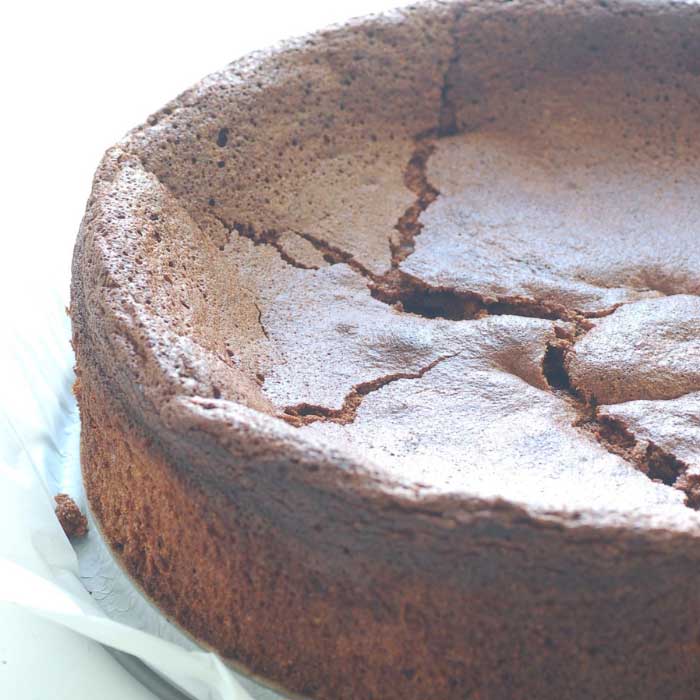
Help, my Cake is Cracked
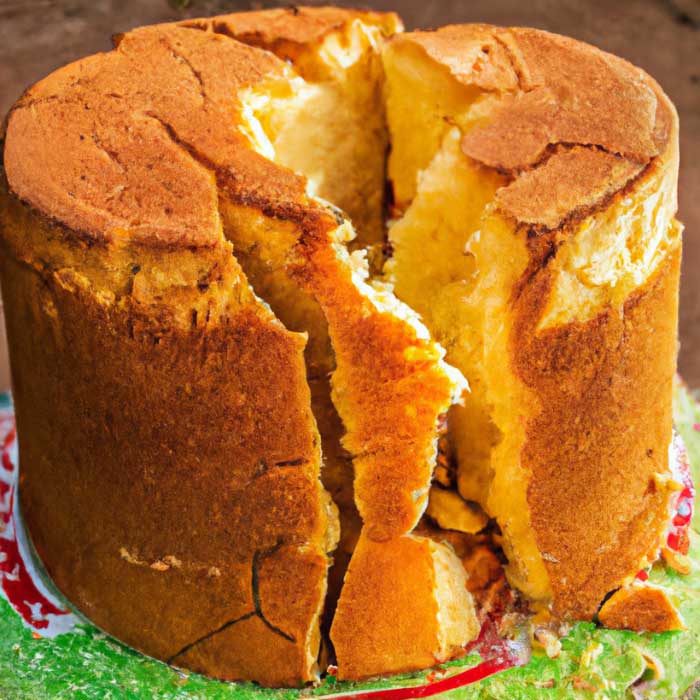
Oh, the dreaded broken cake. Whether your pan is too small, the oven temperature is too hot or you added too much rising agent, cracked cakes happen to the best of us. The good news is, there are a few ways to prevent this baking blunder.
Make sure the oven temperature is spot on – if the oven is too hot, the side of the cake bake first and forms a crust. Then, as the center rises, it cracks that crust. If possible, use a thermometer to regulate the temperature, and if you detect any cracking early on, simply reduce the temperature of the oven and bake for slightly longer.
Follow the recipe to a T – as we’ve learned from the above, inaccurate measuring, overmixing, or adding too much rising agents into the batter can spell disaster.
Use the correct cake tin – as a general rule, the batter should fill around ½ to 2/3 of the tin. You don't want to overfill it and end up with a cake spilling over the sides.
Even Baking – Bake in the center of the oven using the convention setting instead of fan. You can also wrap damp cake strips around the outside of the cake to encourage even baking, plus it will keep your cake perfectly flat – bonus! The damp fabric helps keep the outside of the pan cooler, ensuring the whole cake bakes at the same temperature. Or, if you’re feeling crafty, you can make your own by covering damp paper towels in tin foil and wrap around the tin.
No peeking! – resist the urge as opening and closing the oven door can cause the temperature to fluctuate. Let it work its magic in peace!
How do I fix it?
No need to panic! If those cracks are tiny, just slap on a layer of frosting, and voila! Good as new. If, however, it looks like your cake has been through a tornado, use a dab of frosting to stick the pieces back together, followed by a thin layer of slightly softened frosting to create a "crumb layer." Now it’s time to let your creative genius run wild with the decorating.
Or, of course, you can always try flipping your cake around or if it’s that bad, just crumble it up and turn it into a brand-new batch of tasty treats. Check out our blog here for more details.
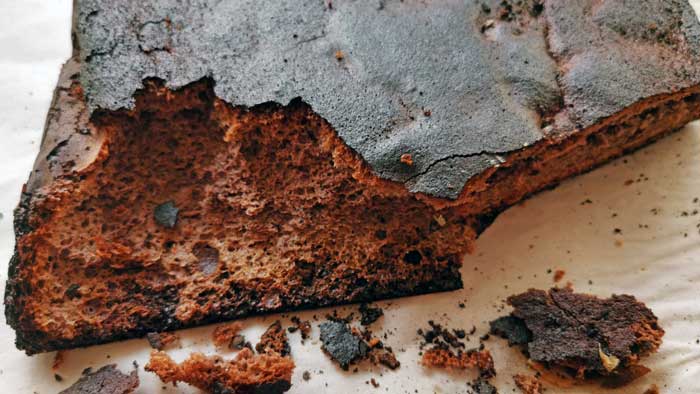
Help my Cake is Burnt and Dry
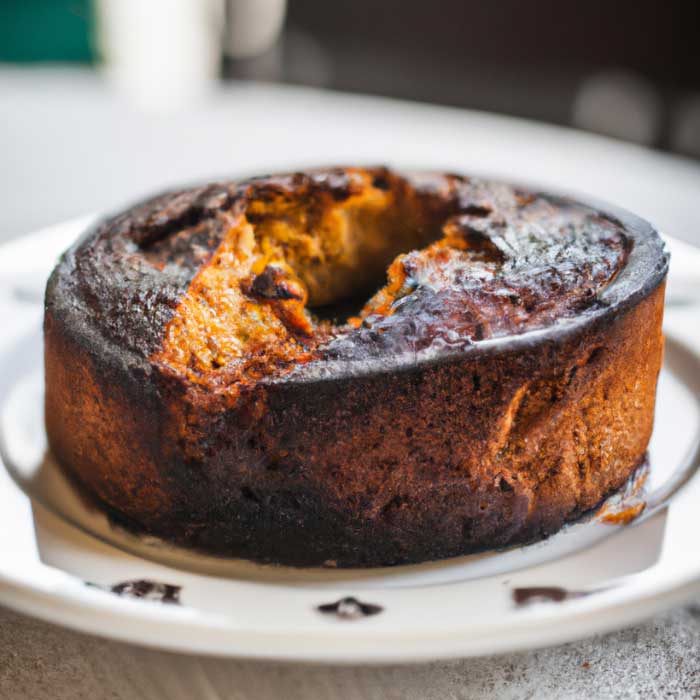
You had big plans for that cake but, somewhere along the way, things went a little wrong and now you're left with more of a charcoal brick.
How do I fix it?
If the cake is only slightly burnt on the edges, you can trim them off and pretend it never happened. If the entire cake is as dry as the Sahara desert, try brushing it with a simple syrup of equal parts sugar and water to add some much-needed moisture. Top tip: poking the cake with a fork will allow it to absorb more syrup.
You can also just cover it in frosting and moist ingredients (with the hope that more moisture absorbs into the cake) and hope for the best!
Help, my Cake is Crumbling
Uh-oh, it looks like your cake has gone rogue and turned into a crumbly mess. In addition to the usual suspects of adding too much flour, not enough fat, overmixing, overcooking, and incorrect oven temperature, the wrong knife could just be the culprit. Always use a sharp and serrated knife for the best chance of a successful slice.
If, however, your cake is beyond repair and you're left with a pile of crumbs, don't toss it just yet. Channel your inner creativity and turn those crumbles into cake pops or check out our blog for other ingenious ideas.
Final thoughts...
Baking can be a tricky business, but with the right tools and attitude, you can fix any baking mishap that comes your way. Just remember to stay calm, follow the baking tips outlined in this blog, and don't be afraid to try new things. Baking mishaps can be frustrating, but they are also a learning opportunity. So embrace the chaos, enjoy the process, and most importantly, have fun in the kitchen! Happy baking!
Check out our blog page here to stay on top of the latest tips, tricks, and trends in the baking world!
